Showing posts with label DIY. Show all posts
Monday, May 14, 2012
Tuesday, March 22, 2011
Beautiful Things
A small collection of things I'd like to buy and make. I know, I know, I always say I'll do some DIYs but I'm a busy girl, what can I say? Enjoy this lovely eye candy.
Thursday, March 3, 2011
Weekend Challenge
I've been super lazy lately. I see so much going on around me and it all makes me feel unproductive. So this weekend, being that I forgot to call in and tell my boss I'd be around to work (oops), I'm going to take a stab at some cute DIY projects. I'm hoping that I will not only feel productive by the end of Sunday, but I'll have some cute new bracelets (my new obsession) to wear!
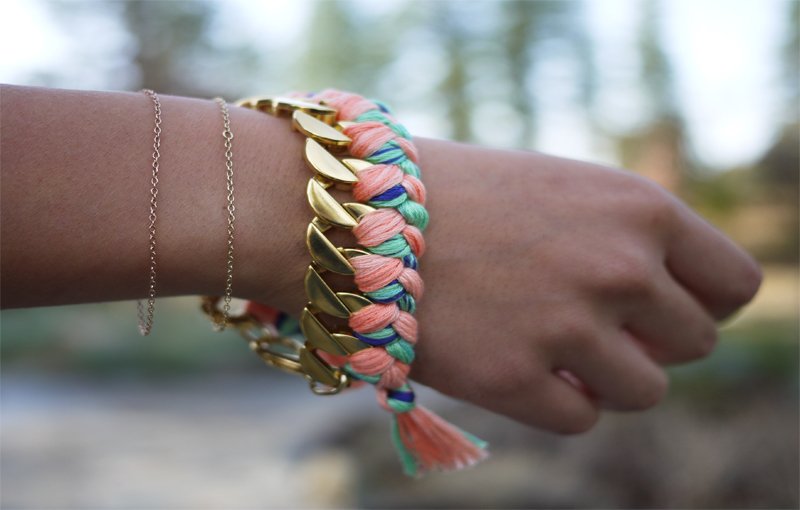
First up: Woven Chain Bracelet
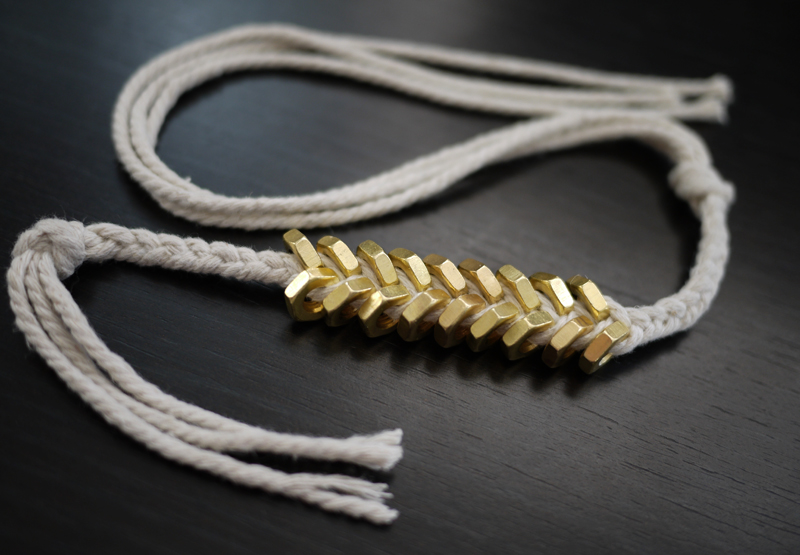
Second: Braided Hex Nut Bracelet
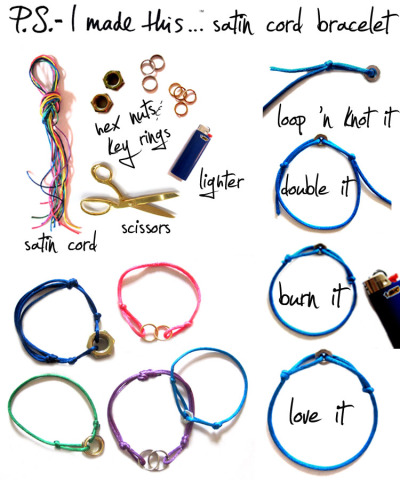
Third: Satin Cord Bracelet
So hopefully by the end of this weekend I'll have some lovely, colorful new bracelets to show you all! Wish me luck.
*Photos courtesy of Honestly WTF and PS I Made This
PS. I just purchased this cable knit sweater from Decades Past... how cute?!
Labels:
DIY
Wednesday, October 13, 2010
Dora the Explorer
And I now have this year's halloween costume! Thank you, Jessica Alba. Added bonus: I can totally hide booze in the backpack!
*photos from the Superficial
Wednesday, September 22, 2010
DIY side fringe
you all know you have them - those oversized shirts with band logos, brand names, etc. you wear them to bed because they're too shapeless and blah to wear in public. well, consider them sleepwear no longer! all you need is a pair of scissors and you can help your poor little shirts that are stuffed in the backs of your draws being ignored. no threads in a closet should go ignored!
(sidenote: okay, you caught me! I actually bought this shirt yesterday, but I decided it needed a little sprucing up because I wasn't about to leave the fierceness of gaga to just be a bed shirt!)
the process is a bit time consuming, but I find it goes faster if I do it while watching my favorite movie I've seen a billion times and don't really need to pay attention. it's like being a grandmother only more chic... besides, I don't think grandmothers would take up knitting a lady gaga shirt.
step one: wash the shirt. mmm, so fresh and so clean.
step two: get yourselves a pair of sharp scissors, unlike the ones your third grade sister uses in class.
step three: lay your shirt on the ground (it's easier to cut when you aren't worried about cutting up your bedsheets beneath your shirt while DIYing!)
step four: cut an inch/inch and 1/2 into your shirt, starting at one edge, all the way up to the underpart of the sleeve.
step five: after all of your cuts have been made (in hopefully equal lengths), cut up the entire length of the side, cutting free the "loops" you have created by your previous cuts.
step 6: tie, tie, tie! double knots for security is a good idea because i'm sure you don't want your shirts to come undone and expose yourself at the wrong time!
step seven: make a small cut just before the hem of the sleeve, enough to get a clean rip, and rip the hem off in one easy pull.
voila! you now have a shirt that has a sign of -something- going on rather than just a boxy shape, and an added plus: a slimmer shape! enjoy.
(sidenote: okay, you caught me! I actually bought this shirt yesterday, but I decided it needed a little sprucing up because I wasn't about to leave the fierceness of gaga to just be a bed shirt!)
the process is a bit time consuming, but I find it goes faster if I do it while watching my favorite movie I've seen a billion times and don't really need to pay attention. it's like being a grandmother only more chic... besides, I don't think grandmothers would take up knitting a lady gaga shirt.
step one: wash the shirt. mmm, so fresh and so clean.
step two: get yourselves a pair of sharp scissors, unlike the ones your third grade sister uses in class.
step three: lay your shirt on the ground (it's easier to cut when you aren't worried about cutting up your bedsheets beneath your shirt while DIYing!)
step four: cut an inch/inch and 1/2 into your shirt, starting at one edge, all the way up to the underpart of the sleeve.
step five: after all of your cuts have been made (in hopefully equal lengths), cut up the entire length of the side, cutting free the "loops" you have created by your previous cuts.
step 6: tie, tie, tie! double knots for security is a good idea because i'm sure you don't want your shirts to come undone and expose yourself at the wrong time!
step seven: make a small cut just before the hem of the sleeve, enough to get a clean rip, and rip the hem off in one easy pull.
voila! you now have a shirt that has a sign of -something- going on rather than just a boxy shape, and an added plus: a slimmer shape! enjoy.
Friday, September 17, 2010
DIY wall decor
okay, so calling this decor is a bit overstated, but it's still a pleasant way to spruce up some bare walls in a cute way! i got the idea from a picture i found on tumblr, and i immediately asked myself why i never thought of that first! i have so many magazines piled high in my room with fantastic advertisements from all of my favorite designers and brands - chanel, michael kors, ysl, marc jacobs... the list goes on and on. so with the idea from the photo i came across, i decided to give it a shot by doing my own name in the same way. it's nothing too fancy or involved, but i think it's cute.
and voila, there you have it! a very simple way to create some cool wall art. by the way, don't even get me started on the color of my walls! i don't know what i was thinking picking out that terrible color...
my inspiration:
and here's what i "created" ... sorry for the shatty pictures, for i placed them on my mirror and it's a bit confusing to see the difference between the letters and things in the background
and voila, there you have it! a very simple way to create some cool wall art. by the way, don't even get me started on the color of my walls! i don't know what i was thinking picking out that terrible color...
Labels:
DIY
Monday, August 23, 2010
Sunday, May 30, 2010
organization 101
i'm trying to organize all of my beauty products . this is for my hair products, and i'll be getting another for my makeup. just an easy way for me to get things done and show anyone on here who's interested how i store things. woohoo for being organized!
brushes, combs, hair clips, pins, elastic bands

heat protectant x2, replenishing mist, dry shampoo

headbands [not all are included]
and voila!
Subscribe to:
Posts (Atom)